


I came back from the Keys and dove right into a little project I have been thinking of for awhile. While out yesterday, picking up fall books, I scooted by JCrew and saw that the Soludos (espadrilles) for JCrew were on sale. $14.95, down from $24, down from $39 dollars. I have been wanting to try dying a pair all summer and at this price, how could I resist?
I wasn't fully prepared to take the leap until I tried a few sample ideas on some similar scrap fabric I had. I originally thought that I would do some kind of ikat print but when I tried that, and chevrons, stripes and ombre - it was the stripes and ombre that I thought came out the best.

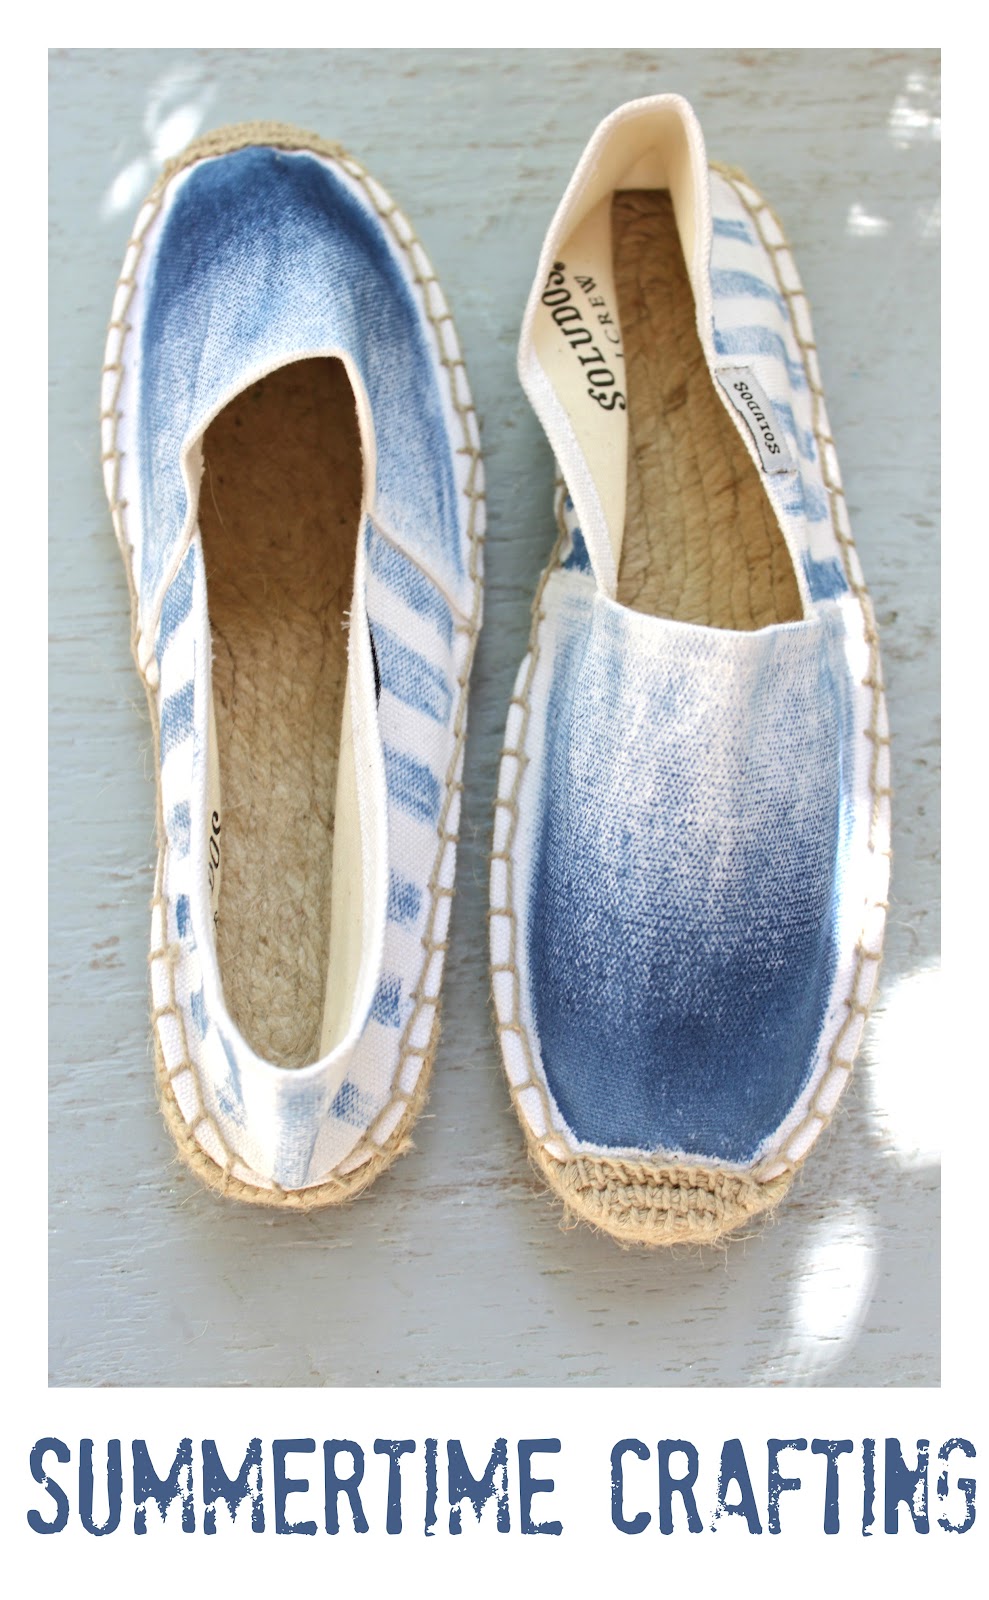
It was very easy to do ... and fast. I used a Tulip one-step dye kit that required minimal fuss. The powder is already in the bottle - you add water and shake. Ready to go. When it came to my samples, I used a simple little brush and I liked that effect the most. I threw on the ombre sample for the front and the stripe sample for the sides and thought it might work. Worst case scenario - I would paint the hole thing with the dye. I also slipped plastic wrap into the shoe to fill out folds to make it easier to paint and also to prevent the dye from running through the fabric. (Note - I used such little dye on the brush that it never made it through the fabric. Not even on the toes.)

1 - I stared with the toe and worked out. The dye worked a little different on the shoes than in my sample but I got the hang of it before I ruined the first shoe.
2 - Once I liked the depth of the colour on the toe, I continued working layers of the dye so that I was almost just dry brushing the area around the top of the foot.
3 - I just went freehand with my stripes and even though they weren't perfect it all seems to work itself out when it dries. In other words, the dye on canvas appears very forgiving. My first stripe, the width of my brush (about a third of an inch) started at the middle of the foot where ombre layer finished. I worked the stripes on one side to the heel, than began the stripes on the other side at the ombre layer and met the stripes up at the heel again, eyeballing so that the stripes were as even as possible.
4 - Once I had the general idea with one shoe I went on to the other with the exact same steps.
5 - I worked just a little dye with the brush and filled out any obvious imperfections and areas that didn't seem dark enough.
I am not sure if I might use my steam iron tomorrow to set the dye. The directions say to wash the garment after letting it set (wet and covered in plastic wrap) for 6 - 8 hours. I applied this dry so that won't work. I am going to let it dry for a few days then steam. Hopefully the whole thing doesn't run in the rain ... I'll let you know if it does. I tried wetting the samples and they ran just a little but they hadn't set for long, so we will see.
I kind of wished I started this project at the beginning of the summer. I could have made a whole rainbow of colours but they wouldn't have been on sale ... and therefore I wouldn't have wanted to take a chance so maybe this is for the best. It's August and I think there is still a little room for summertime crafting ... don't you?
I hope September is warm ...
I love the way your shoes turned out! What a great project.
ReplyDeleteThanks Kathi - I wore them last night for dinner out :)
ReplyDeleteOh me oh my...these are amazing!!! You always have the BEST ideas! Thank you so much for sharing...now you have me wanting to find a pair of espadrilles! Thanks again...you really have such specatular ideas. xoxox
ReplyDeleteWhat a great idea! Simple and unique!
ReplyDeleteTracey,
ReplyDeleteI think this is such a great idea and I love how they look! You took them from boring to a whole new place. So original : )
xo
Ashlyn
So many useful information here in this post, thank you for sharing.
ReplyDeleteBookmarked this website, This site contains valuable information. Thanks..
ReplyDeleteI am really happy with the articles quality. Keep on blogging, its great!
ReplyDeleteThanks a lot for this great stuff here. I am very much thankful for this site.
ReplyDeleteI like this post. quite informative blog. Keep blogging.. thanks
ReplyDeleteYou make so many great post here. I read your article twice. Its good!
ReplyDeleteI’ve been following this web site. Thank you for providing a fine content!!!
ReplyDeleteYou have nice post. Check this profile for more interesting stuffs. Awesome!
ReplyDeleteA really good post, Very thankful. Write many more posts like this one.
ReplyDeleteI love how you customized your shoes!
ReplyDelete